如何壓縮 JPG 檔案:2026 年更快載入與高畫質的完整指南
目錄
2026 年壓縮 JPG 檔案最有效的方法是兩步法:先調整到顯示尺寸,再以 75-85% 品質進行有損壓縮。這套「組合拳」通常可將檔案體積縮減 40-70%,同時影像在視覺上與原圖無異。TinyIMG 等線上工具與 Mac 預覽(Mac Preview)等原生應用程式都能為任何工作流程高效完成這項任務。
「組合拳」工作流程:如何壓縮 JPG 以獲得最佳效果
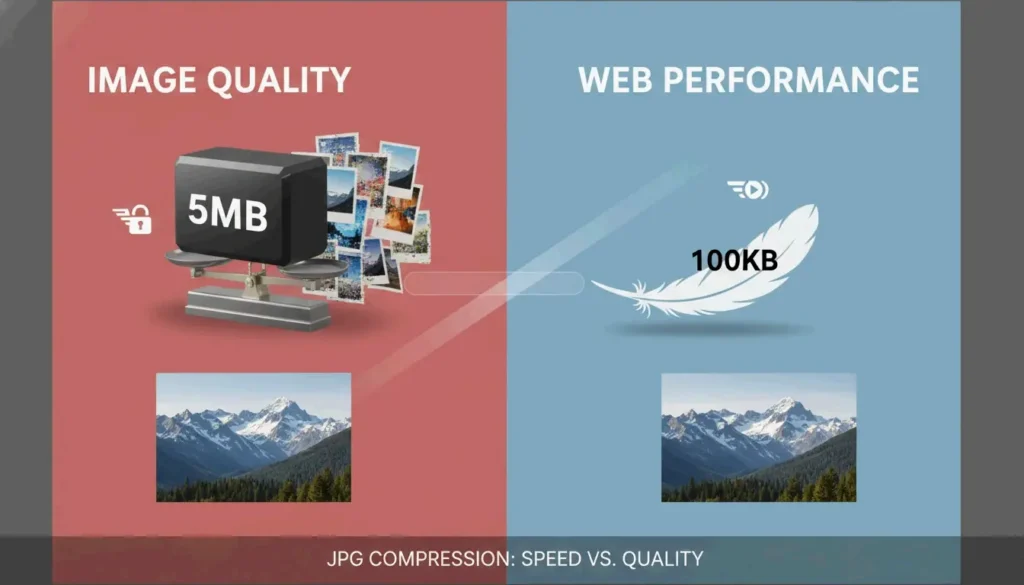
現代智慧型手機和專業相機拍攝的高解析度照片通常在 5MB 到 10MB 之間。對這些檔案單純點擊「壓縮」往往不足以完成網頁最佳化。要在不引入模糊或偽影的前提下達到 100KB 這樣的目標體積,需要一套兩步策略。
根據 ShortPixel 的說明,若不先調整尺寸,強行把一張 2000px 寬的影像塞進 100KB 的檔案會產生肉眼可見的像素化結果。「組合拳」法透過先處理尺寸、再處理資料來解決這個問題。
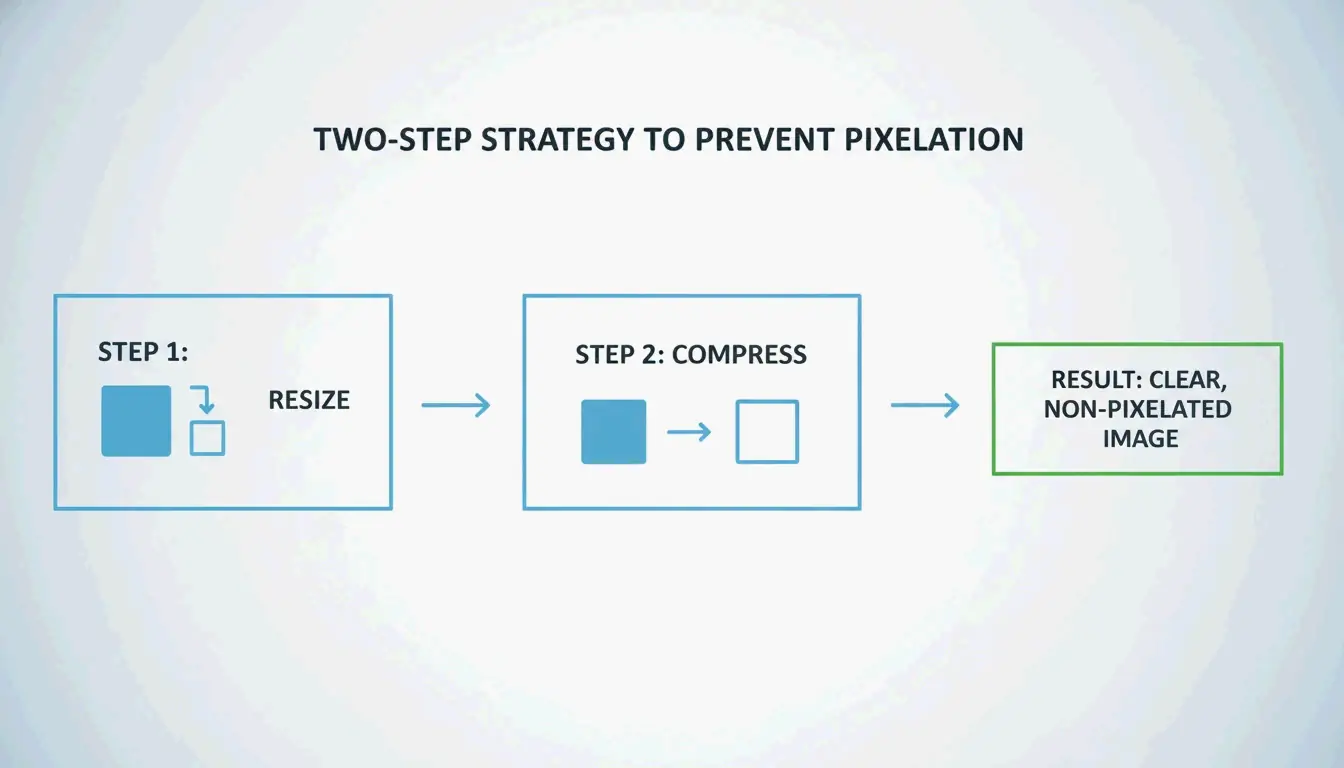
第一步:調整到顯示尺寸
壓縮之前,先將像素尺寸設定為與網站上的實際顯示尺寸相符。常見目標:
| 使用情境 | 建議寬度 |
|---|---|
| 部落格主圖 | 1200px – 2000px |
| 縮圖 | 400px – 600px |
| 大頭貼 | 200px – 400px |
縮小尺寸是降低檔案體積最快的方式。
第二步:進行有損壓縮
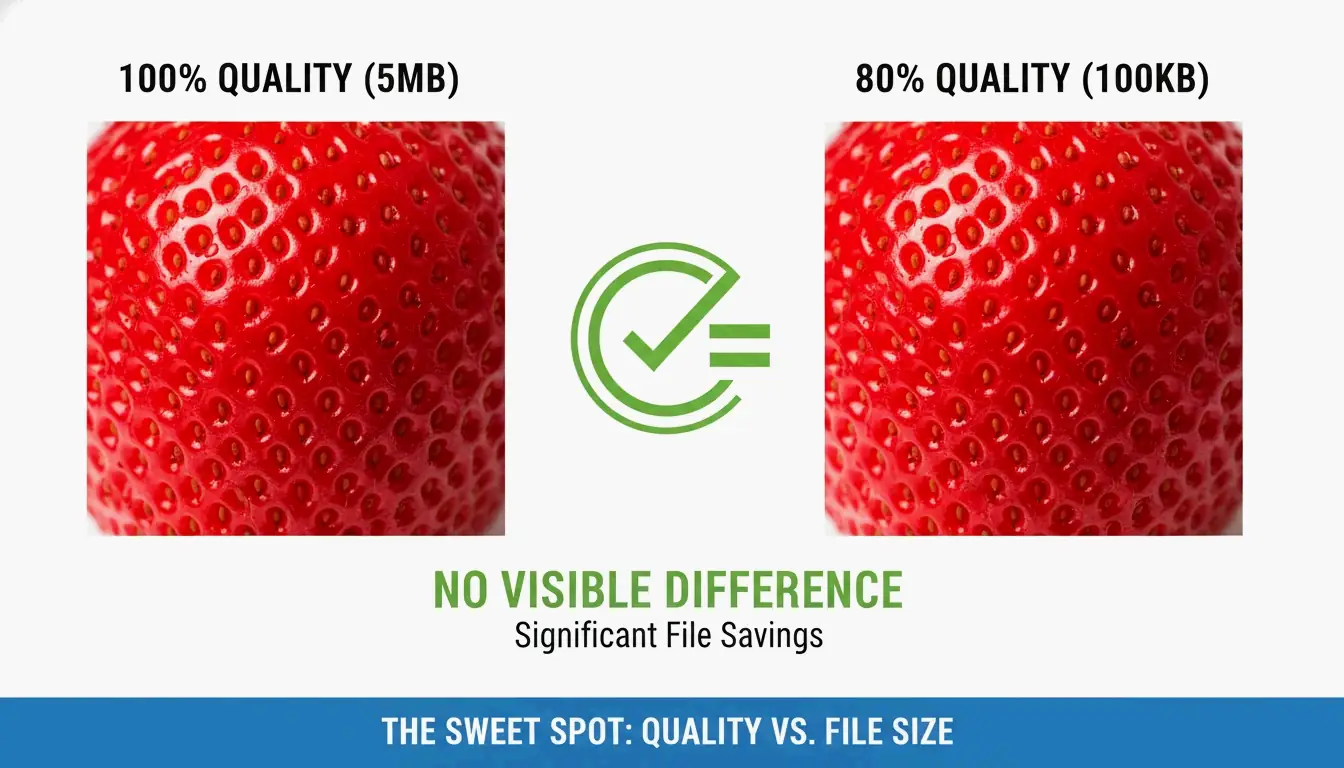
影像尺寸正確後,使用有損壓縮剔除不必要的資料。這個過程會修改影像底層的程式碼,移除人眼無法察覺的細節。ShortPixel 示範了將尺寸調整到 1200px 並搭配智慧壓縮,可把一張 5MB 的照片壓縮到 100KB 以內——縮減幅度達 98%——同時保持畫面清晰。
尋找最佳平衡點:75-85% 品質法則
來自 GWAA 的技術指南將 75-85% 品質區間確立為專業級的「最佳平衡點」。在此區間內,檔案體積可節省 40-70%,與原圖並排比較時幾乎察覺不到差異。
線上壓縮 JPG 的最佳工具:方案比較
選擇合適的工具取決於你的優先順序:隱私、速度,還是批次處理能力。
| 工具 | 處理位置 | 最適用途 | 隱私等級 |
|---|---|---|---|
| TinyIMG | 伺服器端 | Shopify/電商的批次 SEO 最佳化 | 伺服器處理,隨後刪除 |
| TinyJPG | 伺服器端 | 快速單圖壓縮 | 伺服器處理,隨後刪除 |
| CodeItBro | 瀏覽器端(HTML5 Canvas) | 注重隱私的影像 | 檔案永不離開你的裝置 |
| FreeToolio | 瀏覽器端(HTML5 Canvas) | 僅本機處理 | 檔案永不離開你的裝置 |
| Adobe Express | 伺服器端 | 手動單圖控制 | 標準雲端政策 |
| GWAA | 伺服器端 | 快速網頁壓縮 | 安全伺服器,自動刪除 |
GWAA 在安全伺服器上處理影像,並在處理後刪除。為了最大程度的隱私,像 CodeItBro 和 FreeToolio 這樣的瀏覽器端工具使用 HTML5 Canvas 直接在你的裝置上壓縮影像。
如何在 Windows 和 Mac 上壓縮 JPG(無需安裝軟體)
兩大主流作業系統都內建了壓縮工具,無需額外軟體。
Windows 相片應用程式
- 在 Windows 相片(Windows Photos) 應用程式中開啟你的 JPG。
- 點擊三點選單並選擇 調整影像大小(Resize image)。
- 調整 品質(Quality) 滑桿以縮小檔案體積。
- 儲存新版本。Windows 小畫家(Paint) 也透過「調整大小(Resize)」按鈕提供以百分比和像素為基準的調整。
Mac 預覽
- 在 Mac 預覽(Mac Preview) 中開啟影像。
- 前往 工具 > 調整大小(Tools > Adjust Size) 來變更尺寸。
- 前往 檔案 > 輸出(File > Export) 存取壓縮選項。
- 移動 品質(Quality) 滑桿即可即時查看預測的檔案體積更新。
剝離 EXIF 中繼資料
JPG 檔案體積的很大一部分來自 EXIF 中繼資料——包括相機設定、GPS 位置和時間戳等隱藏資訊。Mac 上的 ImageOptim 等工具,或 ShortPixel 內部的設定,會剝離這些資料,在不修改實際影像任何一個像素的前提下節省額外的 KB。
JPEG 之外:2026 年你應該使用 WebP 還是 AVIF?
JPG 仍是通用標準,但對於現代網頁應用而言,較新的格式能提供顯著更高的效率。
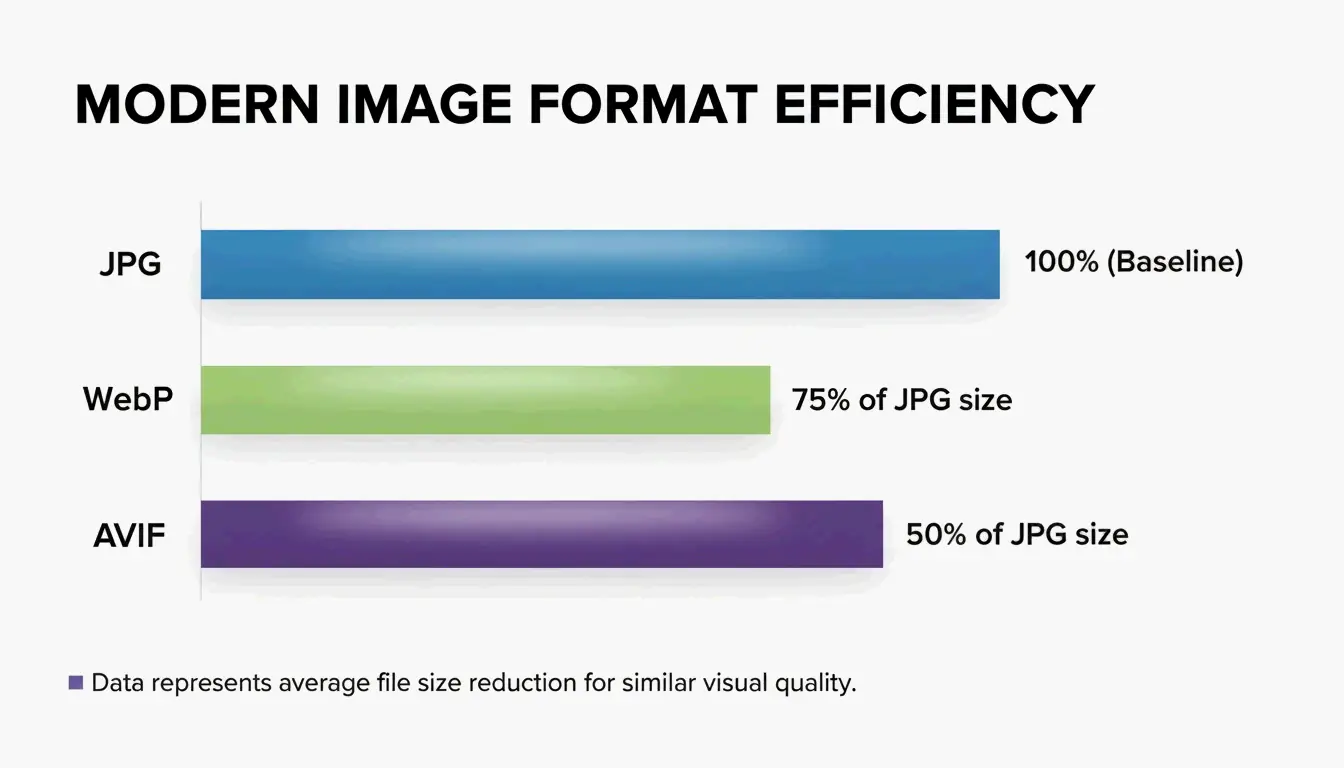
| 格式 | 相比 JPEG 的大小 | 主要特性 | 瀏覽器支援度(2026) |
|---|---|---|---|
| AVIF | 小 50-60% | 支援 HDR、透明度 | ~93% |
| WebP | 小 25-34% | 相容性廣、透明度 | ~97% |
| JPEG | 基準 | 通用相容 | 100% |
根據 Graviton (2026),AVIF 是目前可用的最高效格式。WebP 在壓縮與相容性之間取得了平衡,根據 TinyIMG 引用的 Google Developers 研究,其體積比 JPEG 小約 25-34%。
直接切換到這些格式可以改善 Core Web Vitals,尤其是最大內容繪製(LCP)分數。為了 2026 年的全面相容性,開發者使用 picture 元素向現代瀏覽器提供 AVIF,並以 JPG 作為後援。
有損壓縮與世代耗損的科學
理解壓縮機制能帶來更好的結果。JPEG 使用離散餘弦變換(DCT)過程,將影像資料分解為頻率分量。「有損」操作發生在量化(quantization)階段,演算法在此丟棄人眼難以察覺的高頻細節。GWAA 指出,你的品質設定(1-100)直接控制這些量化表。
關鍵警告:避免對已壓縮的檔案再次壓縮。 這會導致世代耗損(Generation Loss)——一種累積性的畫質退化,每次儲存循環都會增加新的模糊偽影和渾濁紋理。請始終從原始的、未壓縮的來源檔案開始。
結論
要在 2026 年精通 JPG 壓縮,需要在尺寸與現代有損演算法之間取得平衡。透過維持 75-85% 品質區間、針對特定的顯示需求調整尺寸,並剝離隱藏的 EXIF 中繼資料,你可以在不犧牲視覺畫質的前提下實現快速載入的頁面。
推薦工作流程: 先調整尺寸,然後在上傳前使用 TinyIMG 或 ShortPixel 等工具進行最終壓縮與格式轉換。
常見問題
50 KB 算是網頁用的小影像檔案體積嗎?
是的,50 KB 是標準部落格影像、縮圖或 UI 元件的絕佳目標。主圖可以安全地落在 150-200 KB 之間。將較小的資源維持在 50 KB 可確保行動使用者獲得快速載入和最佳的 Core Web Vitals 效能。
多次壓縮同一個 JPG 檔案會破壞影像畫質嗎?
會。這個現象被稱為「世代耗損(Generation Loss)」。由於 JPEG 使用有損壓縮,每次儲存循環都會導致離散餘弦變換(DCT)演算法丟棄更多資料。反覆壓縮同一個檔案最終會產生可見的偽影、模糊和色彩失真。
我能把一張 5MB 的高解析度照片壓縮到 100KB 以下而不顯得模糊嗎?
可以,但前提是你要先調整尺寸。一張被強行塞進 100KB 限制的 4000px 影像,由於激進的資料剝離,看起來會極度模糊。如果你先調整到 1200px 寬,100KB 的匯出在網頁瀏覽時仍會保持清晰銳利。