How to Compress JPG Files: The 2026 Guide to Faster Loading and High Quality
Table of Contents
The most effective way to compress JPG files in 2026 is a two-step approach: first resize to display dimensions, then apply lossy compression at 75-85% quality. This “double-punch” method typically reduces file sizes by 40-70% while keeping the image visually indistinguishable from the original. Online tools like TinyIMG and native apps like Mac Preview handle this efficiently for any workflow.
The “Double-Punch” Workflow: How to Compress JPG for Maximum Results
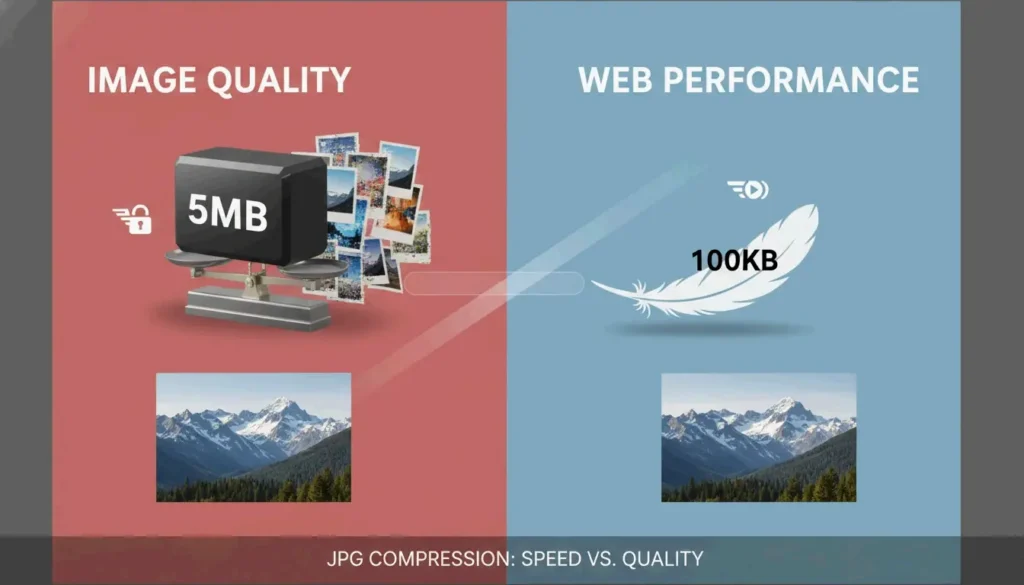
High-resolution photos from modern smartphones and professional cameras typically range from 5MB to 10MB. Simply hitting “compress” on these files is rarely sufficient for web optimization. To reach a target size like 100KB without introducing blur or artifacts, a two-step strategy is required.
According to ShortPixel, forcing a 2000px wide image into a 100KB file without resizing first produces visibly pixelated results. The “Double-Punch” method solves this by addressing dimensions before data.
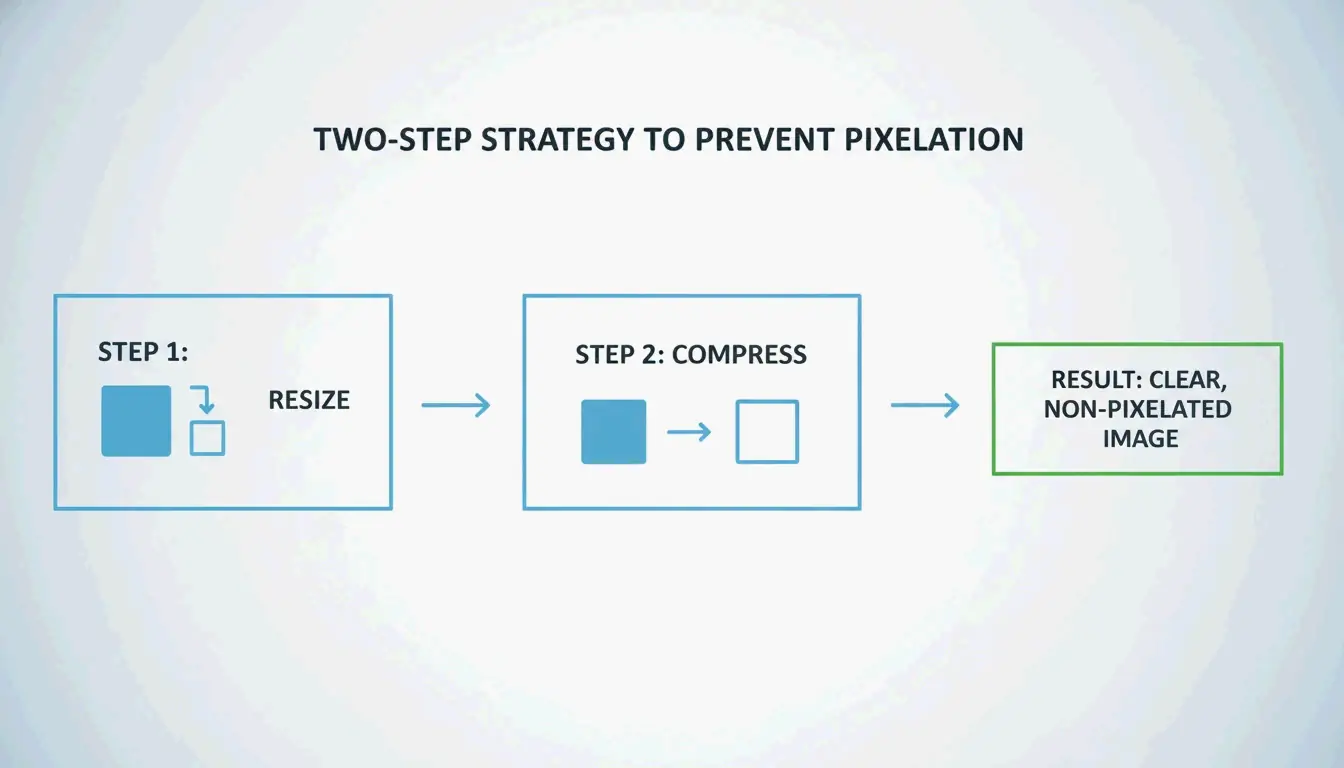
Step 1: Resize to Display Dimensions
Before compressing, set the pixel dimensions to match the actual display size on your site. Common targets:
| Use Case | Recommended Width |
|---|---|
| Blog hero images | 1200px – 2000px |
| Thumbnails | 400px – 600px |
| Profile pictures | 200px – 400px |
Shrinking dimensions is the fastest way to reduce file weight.
Step 2: Apply Lossy Compression
Once the image is at the correct size, use lossy compression to strip unnecessary data. This process modifies the image’s underlying code to remove details invisible to the human eye. ShortPixel demonstrates that combining a resize to 1200px with smart compression can shrink a 5MB photo to under 100KB — a 98% reduction — while maintaining crispness.
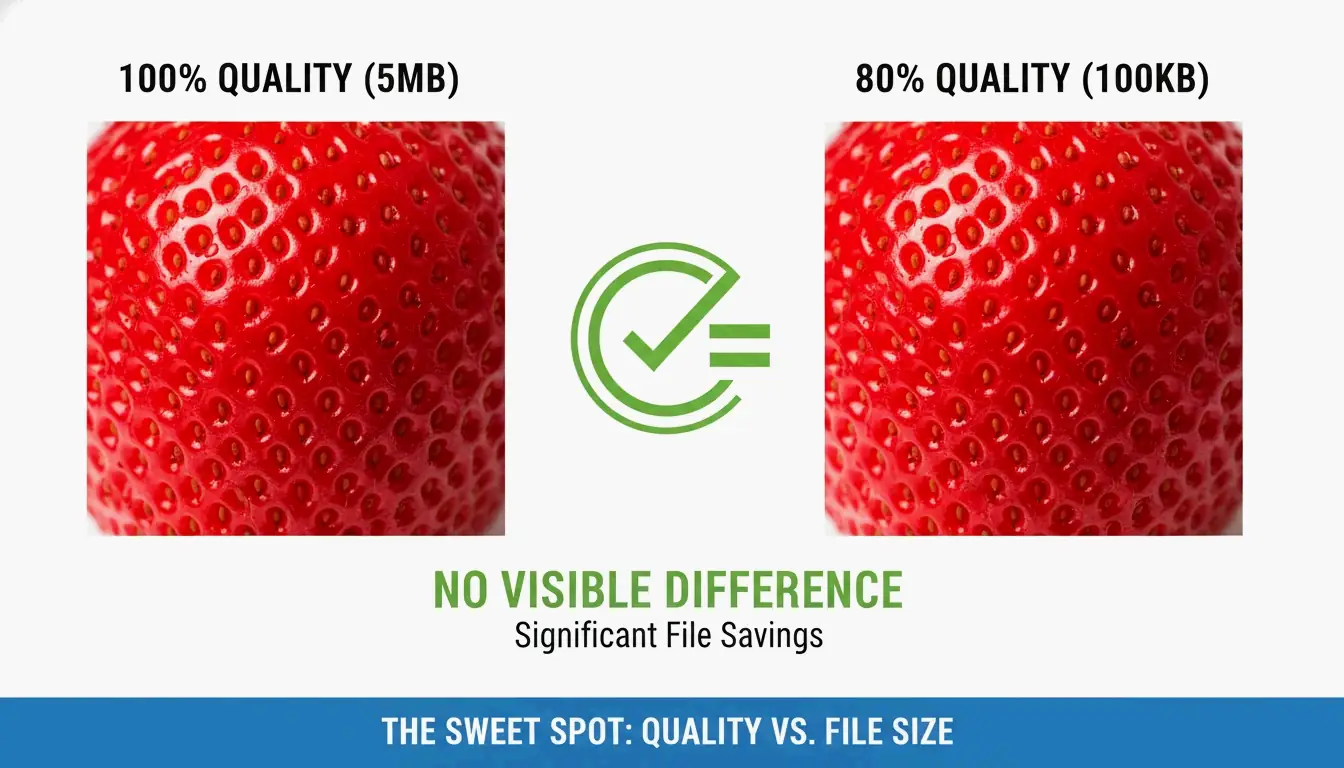
Finding the Sweet Spot: The 75-85% Quality Rule
Technical guides from GWAA identify the 75-85% quality range as the professional “sweet spot.” Within this range, file savings reach 40-70% with no perceptible difference from the original in side-by-side comparison.
Best Tools to Compress JPG Online: Comparing the Options
The right tool depends on your priorities: privacy, speed, or batch capacity.
| Tool | Processing Location | Best For | Privacy Level |
|---|---|---|---|
| TinyIMG | Server-side | Bulk SEO optimization for Shopify/e-commerce | Server-processed, then deleted |
| TinyJPG | Server-side | Quick single-image compression | Server-processed, then deleted |
| CodeItBro | Browser-side (HTML5 Canvas) | Privacy-sensitive images | Files never leave your device |
| FreeToolio | Browser-side (HTML5 Canvas) | Local-only processing | Files never leave your device |
| Adobe Express | Server-side | Manual single-image control | Standard cloud policy |
| GWAA | Server-side | Quick web compression | Secure servers, auto-delete |
GWAA processes images on secure servers and deletes them after processing. For maximum privacy, browser-side tools like CodeItBro and FreeToolio use HTML5 Canvas to compress images directly on your device.
How to Compress JPG on Windows and Mac (No Software Needed)
Both major operating systems include built-in compression tools that require no additional software.
Windows Photos App
- Open your JPG in the Windows Photos app.
- Click the three-dot menu and select Resize image.
- Adjust the Quality slider to reduce file size.
- Save the new version. Windows Paint also offers percentage-based and pixel-based resizing via the “Resize” button.
Mac Preview
- Open the image in Mac Preview.
- Navigate to Tools > Adjust Size to change dimensions.
- Go to File > Export to access compression options.
- Move the Quality slider to see the predicted file size update in real-time.
Stripping EXIF Metadata
A significant portion of a JPG’s file size comes from EXIF metadata — hidden information including camera settings, GPS location, and timestamps. Tools like ImageOptim for Mac or the settings within ShortPixel strip this data, saving additional kilobytes without modifying a single pixel of the actual image.
Beyond JPEG: Should You Use WebP or AVIF in 2026?
JPG remains the universal standard, but newer formats deliver substantially better efficiency for modern web applications.
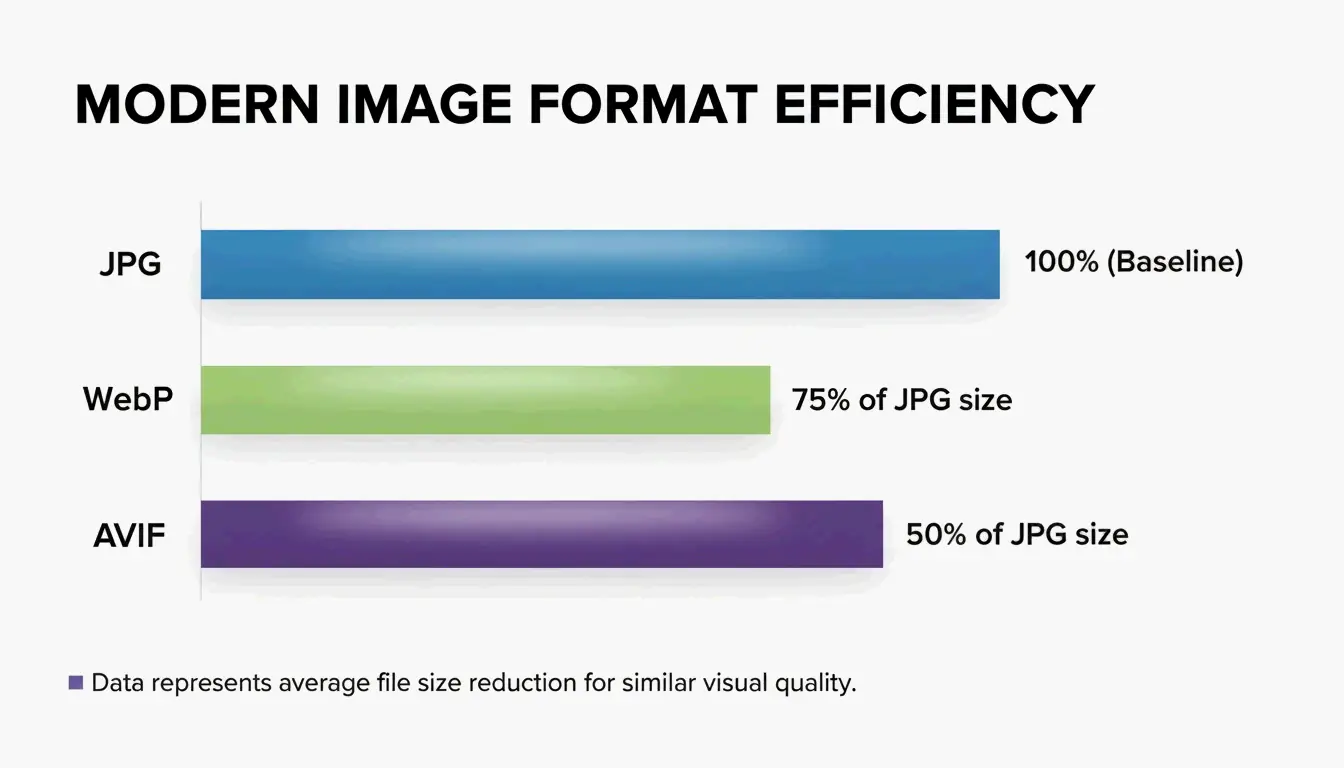
| Format | Size vs. JPEG | Key Features | Browser Support (2026) |
|---|---|---|---|
| AVIF | 50-60% smaller | HDR support, transparency | ~93% |
| WebP | 25-34% smaller | Wide compatibility, transparency | ~97% |
| JPEG | Baseline | Universal compatibility | 100% |
According to Graviton (2026), AVIF is currently the most efficient format available. WebP offers a balance of compression and compatibility, with roughly 25-34% smaller sizes than JPEG based on Google Developers research cited by TinyIMG.
Switching to these formats directly improves Core Web Vitals, specifically the Largest Contentful Paint (LCP) score. For full compatibility in 2026, developers use the picture element to serve AVIF to modern browsers with a JPG fallback.
The Science of Lossy Compression and Generation Loss
Understanding compression mechanics leads to better results. JPEG uses the Discrete Cosine Transform (DCT) process, which breaks image data into frequency components. The “lossy” operation occurs during quantization, where the algorithm discards high-frequency details that human vision cannot easily detect. GWAA notes that your quality setting (1-100) directly controls these quantization tables.
Critical warning: Avoid recompressing already-compressed files. This causes Generation Loss — a compounding degradation where each save cycle adds new blurry artifacts and muddy textures. Always start from your original, uncompressed source file.
Conclusion
Mastering JPG compression in 2026 requires balancing dimensions with modern lossy algorithms. By maintaining the 75-85% quality range, resizing for your specific display requirements, and stripping hidden EXIF metadata, you can achieve fast-loading pages without sacrificing visual quality.
Recommended workflow: Resize first, then use a tool like TinyIMG or ShortPixel for final compression and format conversion before uploading.
FAQ
Is 50 KB considered a small image file size for web use?
Yes, 50 KB is an excellent target for standard blog images, thumbnails, or UI elements. Hero images can safely range between 150-200 KB. Keeping smaller assets at 50 KB ensures rapid loading and optimal Core Web Vitals performance for mobile users.
Does compressing a JPG file multiple times destroy image quality?
Yes. This phenomenon is known as “Generation Loss.” Because JPEG uses lossy compression, each save cycle causes the Discrete Cosine Transform (DCT) algorithm to discard additional data. Repeatedly compressing the same file will eventually produce visible artifacts, blurring, and color distortion.
Can I compress a 5MB high-resolution photo to under 100KB without it looking blurry?
Yes, but only if you resize the dimensions first. A 4000px image forced into a 100KB limit will appear extremely blurry due to aggressive data stripping. If you first resize to 1200px wide, a 100KB export will remain crisp and clear for web viewing.
About the Author
Indie Hacker & DeveloperI'm an indie hacker building iOS and web applications, with a focus on creating practical SaaS products. I specialize in AI SEO, constantly exploring how intelligent technologies can drive sustainable growth and efficiency.
Last reviewed May 16, 2026. This article is reviewed for accuracy and updated when tooling or platform behavior changes.