Resize GIF Without Losing Quality, Speed, or Transparency
Daftar Isi
To resize a GIF, drop the animation into a browser-based GIF resizer, type your target width in pixels with the aspect-ratio lock on, and export. Downscaling cuts file size while frame delays, transparency and looping stay intact — but shrinking never adds detail, so always start from your largest source file.
How Resizing an Animated GIF Actually Works — and What Stays Intact
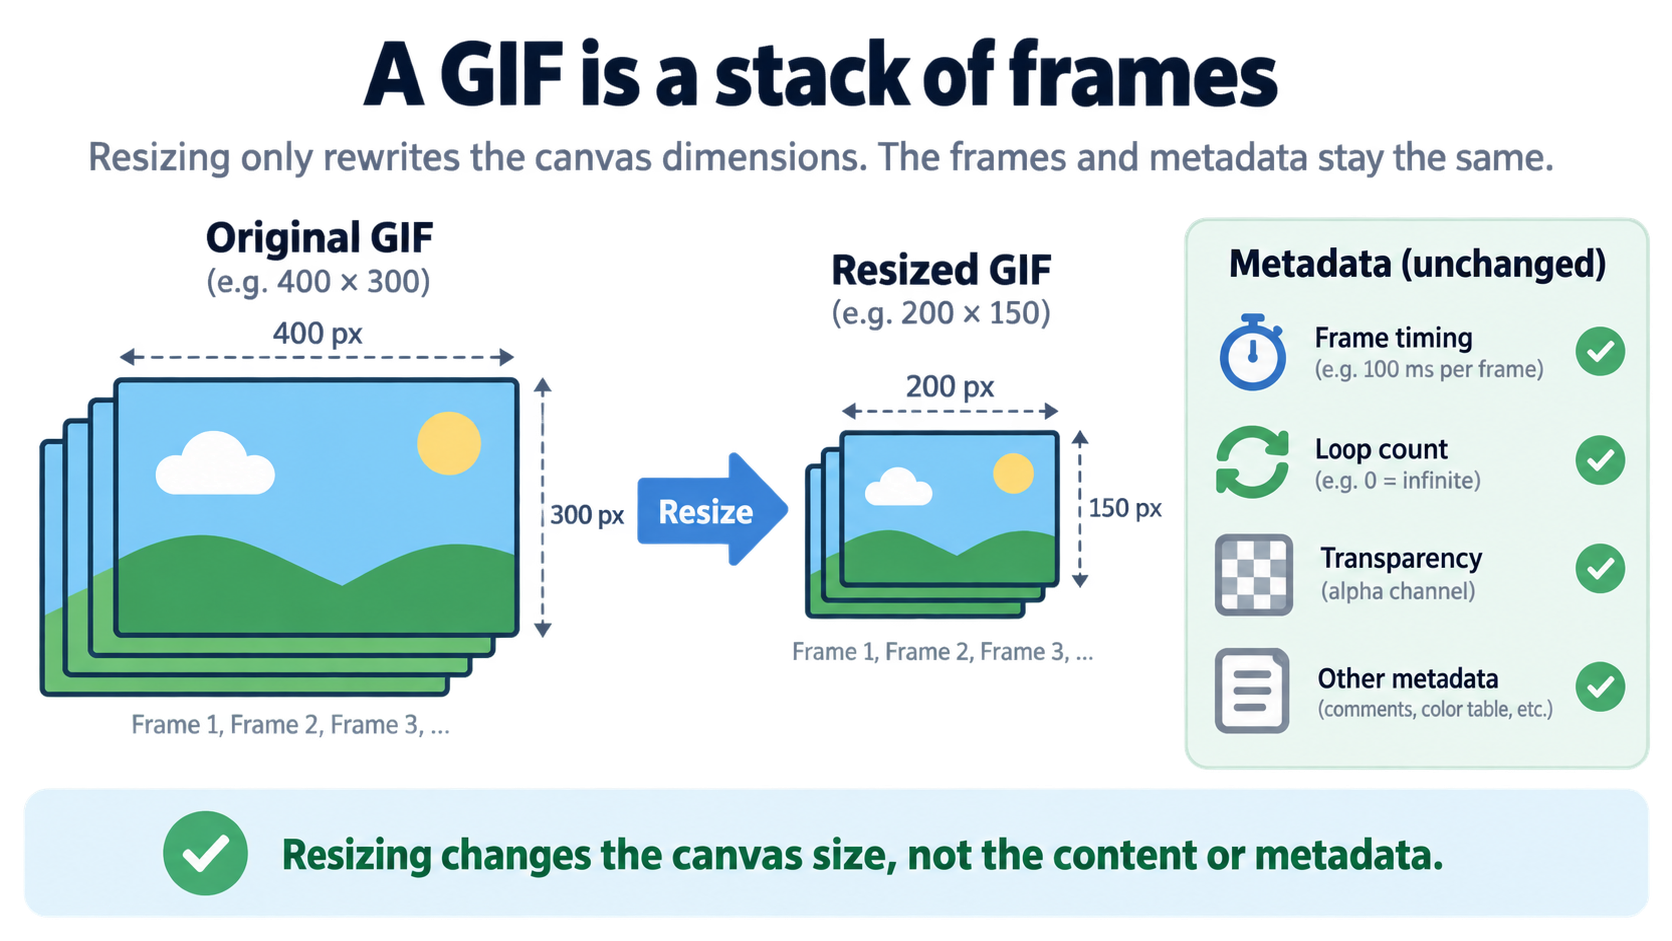
Resizing an animated GIF changes exactly one thing: the pixel canvas. Everything else in the file — how long each frame stays on screen, how many times the animation loops, which colour index is marked transparent — gets copied through untouched by a competent resize operation.
Understand that, and most of what follows in this guide falls into place. AREM Labs states it directly: a standard pixel-dimension resize adjusts only the canvas width and height while leaving frame delay values and looping metadata untouched. As long as the file passes through a tool that preserves frame timing arrays, playback speed stays identical to the original.
The complication is that you’re not resizing one image. You’re resizing a stack of them.
Why a GIF Is Not Just a Bigger PNG
A GIF stores every frame as its own separate, palette-indexed image. According to ShotEdit, a three-second screen recording at 15 frames per second is 45 stored images. That’s why file size grows with duration, frame rate and pixel area all at once — and why a short clip that would be a 400 KB MP4 turns into a 6 MB GIF.
Each of those stored frames carries its own 256-colour palette. GIF supports a maximum of 256 colours per frame, and no amount of scaling changes that ceiling. When a resizer redraws a frame at a new size, it has to re-quantise the colours to fit that palette again. This is the mechanical reason gradients and dither patterns are where visible banding shows up, even when you’re only shrinking.
What Survives a Resize: Frame Delay, Loop Count, Transparency
A resize operation doesn’t touch the frame delay array, the loop/NETSCAPE extension, or the transparent colour index. Those are separate data structures in the file, and a pixel-level resize has no reason to rewrite them.
That’s why playback speed, loop count and transparency survive a correctly executed resize. It’s also why they break when a tool takes a different route — extracting every frame as a separate still, resizing the stills, and rebuilding the animation from scratch. Rebuilding is where timing drifts, loops reset to defaults, and the transparent colour index gets dropped or replaced with a background colour.
How to Resize a GIF in a Browser, Step by Step
This is the primary workflow, and the order matters. Skip a step and you get a specific, predictable failure.
Step 1 — Start from the largest, cleanest source you own. Resizing never adds detail, so your source file defines the ceiling on quality. If you have a video export and a small GIF, resize the video export down rather than upscaling the GIF.
Step 2 — Open a browser-based GIF resizer and load the file. EZGIF and similar no-signup tools cover resize, optimize and crop in one place, so you can complete the whole workflow without moving between applications or formats.
Step 3 — Enter width in pixels with the aspect-ratio lock ON. Let height calculate itself. Typing both numbers manually is how people stretch GIFs. AREM Labs lists unlocking the aspect ratio during scaling as the first common mistake: entering custom width and height values without the lock stretches characters, distorts circular products, and ruins brand presentation.
Step 4 — Pick a resampling method deliberately. Use smooth interpolation — Lanczos, bicubic or bilinear — for footage, reaction clips and photos. Use nearest neighbour for pixel art, UI captures, emoji and anything with hard one-pixel edges. ConvertICO labels these as “Photo and video” (Lanczos), “Smooth pixel art” (xBR/hqx) and “Crisp pixels” (nearest neighbour), and notes that crisp-pixel scaling uses whole-number scales so every original pixel grows by the same amount.
Step 5 — Preview before exporting. Check the busiest frame in the animation for banding, then compare the before and after file size. The busiest frame is where palette re-quantisation shows first.
Step 6 — Only if the export still misses the cap, move to the GIF compression levers. Resize stays first because it’s the most predictable reduction for the least visible quality cost.
Know the ceilings. Browser tools impose input limits — ConvertICO’s GIF upscaler accepts GIFs up to 25 MB and 500 frames with a maximum of 4000 px on any side, and other tool pages in the same category cite comparable figures. Oversized sources need pre-trimming before they will load at all.
The Order That Matters: Resize First, Compress Second
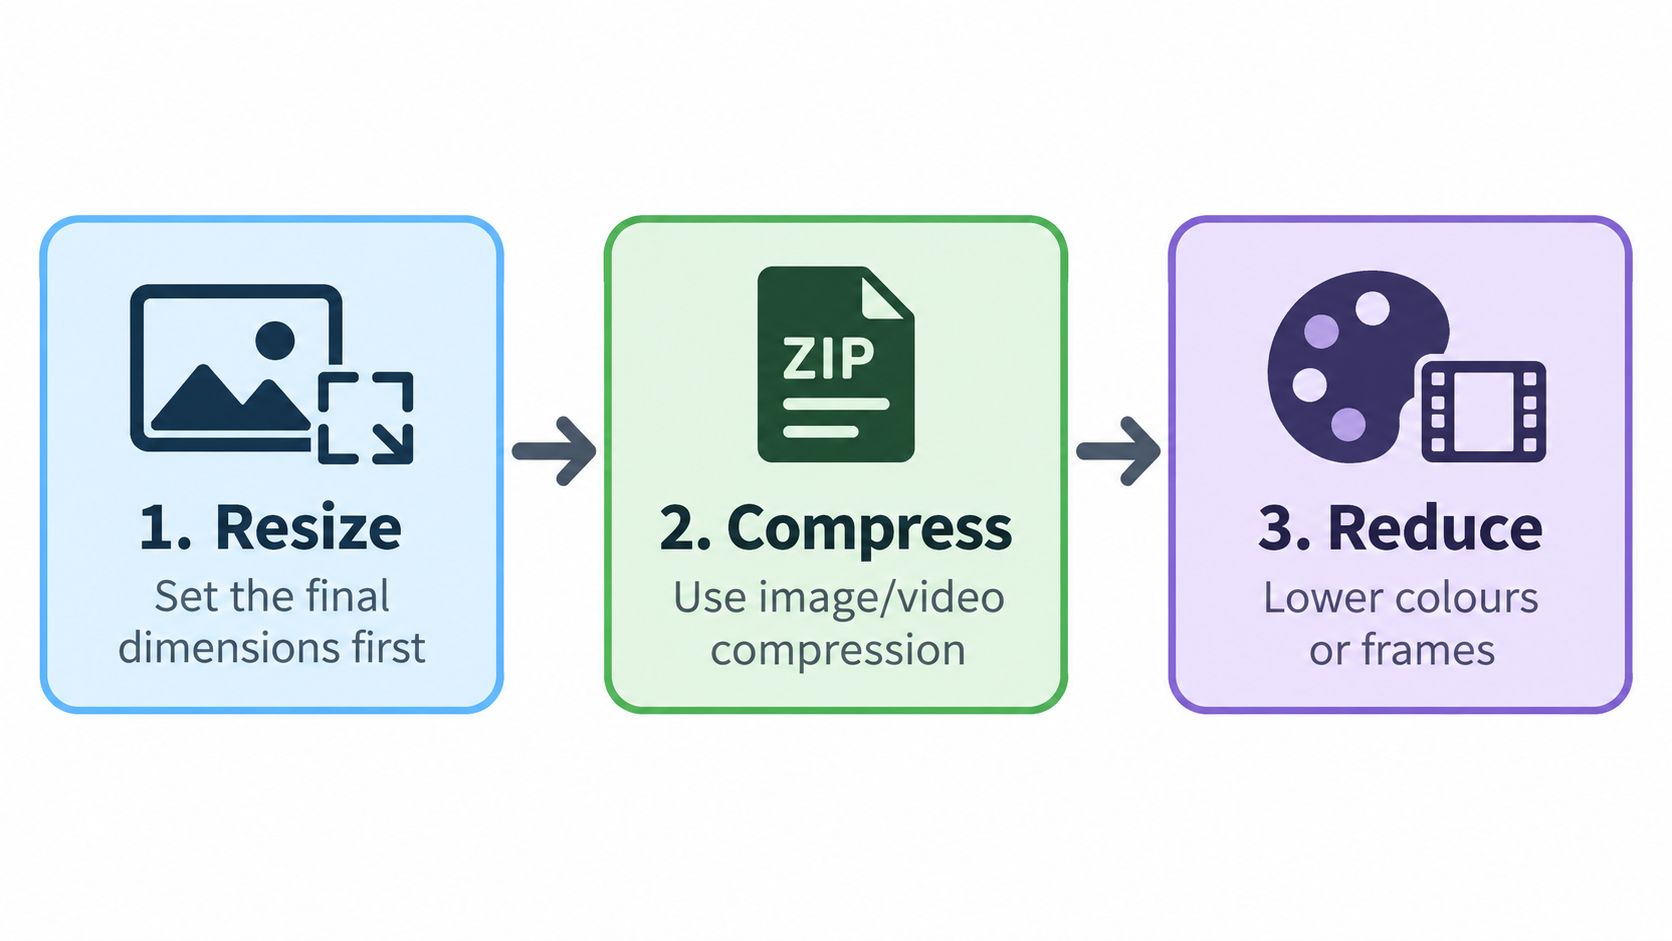
Resize, then compress. Not the other way around.
AREM Labs is explicit about why: compressing a file first introduces compression artifacts that get magnified and blurred during dimensional downscaling, and applying colour optimisation as the final step avoids that. ShotEdit agrees on the ordering logic, calling resize “usually the most reliable reduction when a GIF must hit a hard limit” and noting it costs the least visible quality per kilobyte saved.
Three Mistakes That Ruin the Output
Unlocking the aspect ratio. Custom width and height values without the lock stretch the subject. Keep the lock on and type one number.
Relying on browser CSS for downscaling. Uploading a 2000 px wide GIF and setting its display width to 400 px via HTML or CSS forces every visitor to download the full payload. AREM Labs puts the figure at roughly 15 MB in that example. Resize the source file itself.
Resizing without checking the frame count first. Scaling a 500-frame animation still produces an oversized file even at low resolutions. Trim unneeded frames before scaling, not after.
How Much Does Resizing Actually Shrink a GIF?
The pixel math is the whole story, and it’s simpler than most guides make it sound. Halving both dimensions removes 75% of per-frame pixel area. That’s the primary source of the weight drop.
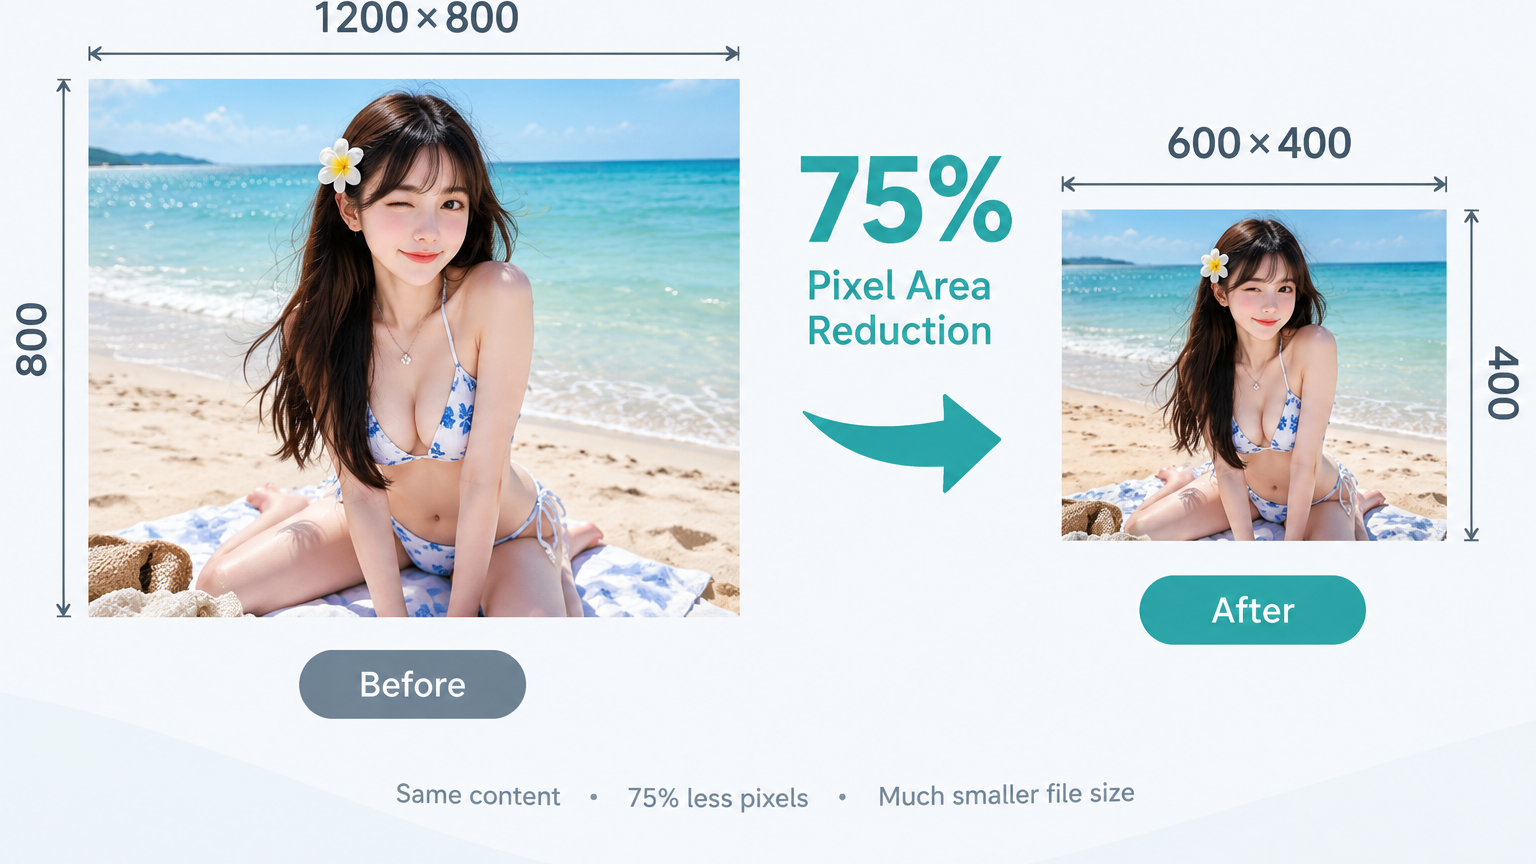
AREM Labs puts it plainly: resizing from 1200×800 to 600×400 cuts the total pixel count per frame by 75 percent, which drastically reduces overall byte size. The weight doesn’t fall by exactly 75% — palette data, headers and per-frame metadata don’t scale with area — but the pixel reduction is what drives the result.
Lossy re-encoding stacks on top of that, but it plateaus fast. According to ShotEdit, a 228 KB clip dropped a further 7% at lossy 30, 15% at lossy 80, and 25% at lossy 200. In other words, tripling the lossy strength from 80 to 200 bought roughly ten additional percentage points of savings — and that’s the point at which dithering artifacts typically become visible.
The Pixels-Are-the-File Rule
GIF file size is driven by frame count multiplied by pixel area multiplied by palette complexity. Resizing touches only the middle term.
This is why the same resize produces dramatically different results on different files. A GIF that was already reduced to a small palette and a low frame rate has little left to give. A GIF freshly exported from a video with a full 256-colour palette per frame has a lot. Two GIFs at identical dimensions can still differ several-fold in weight, so dimensions alone never predict whether you’ll clear a file cap.
Why a Second Round of Compression Barely Helps
GIF has no true inter-frame compression. ShotEdit’s explanation is the clearest available: GIF stores only the changed rectangle of each frame beyond that, so once a recording has gradients, dithering or camera motion, almost every pixel changes between frames and the optimisation stops helping.
That leaves very little redundancy for a second optimisation pass to find. ShotEdit states that palette reduction and lossy smoothing are not cumulative in a useful way, and that re-running the same compression settings returns almost the same file. The practical advice that follows: change a setting instead — resize the frames or lower the colour count — rather than repeating an identical pass.
One exception worth knowing: flat UI recordings and screen captures of interfaces with solid fills barely shrink at any lossy setting, because there’s no dither noise left to smooth away. ShotEdit notes that a two-colour loading spinner is already close to the smallest a GIF can be.
Target Sizes and File-Weight Limits by Platform, Checked October 2026
One table, several channels, with the caveats that most single-source guides leave out. Platform limits drift, and Discord is the clearest current example.
The One-Page Size + Weight + Format Table
| Platform / Use Case | Target Dimensions | Target Weight | Transparency | Source & Check Date |
|---|---|---|---|---|
| Shopify / WooCommerce product body | 600×600 to 800×800 px | Under 2 MB | Supported | AREM Labs, 2026-09-16 |
| Amazon A+ Content (full-width banner) | 970×600 px | Under 3 MB | Supported | AREM Labs, 2026-09-16 |
| Email newsletters (Klaviyo / Mailchimp) | 480×480 to 600×400 px | Under 1 MB | Supported | AREM Labs, 2026-09-16 |
| Etsy product descriptions | 750×500 px | Under 1.5 MB | Supported | AREM Labs, 2026-09-16 |
| X / LinkedIn inline feed | 800×450 to 1200×675 px | Under 5 MB | Supported | AREM Labs, 2026-09-16 |
| UI / software documentation tooltips | 400×300 px | Under 800 KB | Supported | AREM Labs, 2026-09-16 |
| Discord chat (free account) | — | 8 MB or 10 MB — sources conflict | Supported | Wondershare, updated 2026-09-23; ShotEdit, 2026-09-05 |
| Discord chat (Nitro Classic / Nitro) | — | 50 MB / 100 MB | Supported | Wondershare, updated 2026-09-23 |
| Discord animated emoji | 128×128 px | Under 256 KB | Supported | Wondershare, updated 2026-09-23 |
| Slack channel | — | Uploads fine, but over ~2 MB loads slowly | Supported | ShotEdit, 2026-09-05 |
| GitHub issues and pull requests | — | 10 MB per file | Supported | ShotEdit, 2026-09-05 |
| Email attachment (whole message) | — | Commonly 20–25 MB | Supported | ShotEdit, 2026-09-05 |
The Discord conflict deserves to be stated plainly rather than smoothed over. Wondershare’s guide, updated 2026-09-23, lists 8 MB for free accounts — while the same article’s own body text still refers to itself as a 2025 guide. ShotEdit, checked 2026-09-05, lists 10 MB for a free Discord account. Two sources, both recent, disagree by 2 MB. Treat the figure as tier- and date-dependent, and verify against Discord’s own help centre before you commit a workflow to it.
For Web Pages: Why GIF Weight Is a Core Web Vitals Problem
An inline e-commerce product animation is best served at 480–800 px wide, per AREM Labs. That range keeps details sharp on mobile screens and desktop monitors while keeping the payload light enough to maintain fast Core Web Vitals and quick checkout loading.
This matters more for GIFs than for stills because a GIF is downloaded in full by every visitor. Oversized GIF dimensions slow mobile page loading, consume customer data plans, and cause layout shifts on responsive themes — and a layout-shift problem is a Core Web Vitals problem, not merely a storage problem.
AREM Labs frames the fix directly: resize the GIF to the exact pixel dimensions of its container rather than uploading a large file and scaling it down in CSS. If the container is 640 px wide and the animation is 1920 px wide, the answer is a 640 px asset, not a 1920 px asset with a width attribute.
Discord Emoji at 128×128 and 256 KB: The Strictest Target
Animated emoji is the tightest real-world constraint in this table. Wondershare states that animated emoji must be 128×128 pixels, and that regardless of dimensions, all emoji uploads — static or animated — must be under 256 KB.
Meeting both at once is a two-stage job: get the dimensions right first, then attack the weight. This is exactly why resize-then-recolour is the reliable path — 128×128 alone will often not clear 256 KB for a detailed animation, so colour reduction and frame dropping follow the resize. Note also that animated server emoji require Nitro to display as animated, per the same source.
Does an Online GIF Resizer Upload My File?
It depends entirely on the tool’s architecture, and the two architectures are easy to tell apart once you know what to look for.
Server-side tools upload your file, process it on a remote machine, and return the result. Client-side tools process everything on your device — the pixel data never leaves the browser. ImageLean’s GIF resizer is built on the client-side model: resizing runs in your browser, so the animation is not uploaded anywhere. ShotEdit describes its own architecture explicitly: compression runs locally with gifsicle compiled to WebAssembly, and the file never leaves your device.
The practical stakes aren’t abstract. Unreleased product recordings, client footage under NDA, internal dashboards, and anything governed by a company data policy should not be handed to an unknown server. ShotEdit names unreleased product recordings and customer data as the specific cases where local processing matters.
How to Verify a Tool Really Processes Locally
You can test this in about thirty seconds rather than trusting a privacy badge.
Load the tool, start a resize or compression on a reasonably large GIF, then disconnect your network — pull the Wi-Fi or unplug the ethernet. If processing is genuinely client-side, the job finishes normally. If it’s server-side, the job dies when the connection does.
Before uploading anything sensitive, also check three things: the tool’s privacy page, whether its output is re-encoded through a native engine or re-drawn from extracted frames, and whether it states a retention window. ConvertICO, for example, states that uploads and results get random names and are deleted automatically within four hours — a server-side tool with a disclosed retention policy rather than a no-upload tool.
Resize vs Compress vs Crop vs Trim: Pick the Right Lever First
Four terms, four different variables in the file. Confusing them is why people crop a GIF, see no size change, and conclude the tool is broken.
Resize changes canvas dimensions. Compress changes the colour or lossy budget. Crop changes the visible area. Trim changes duration.
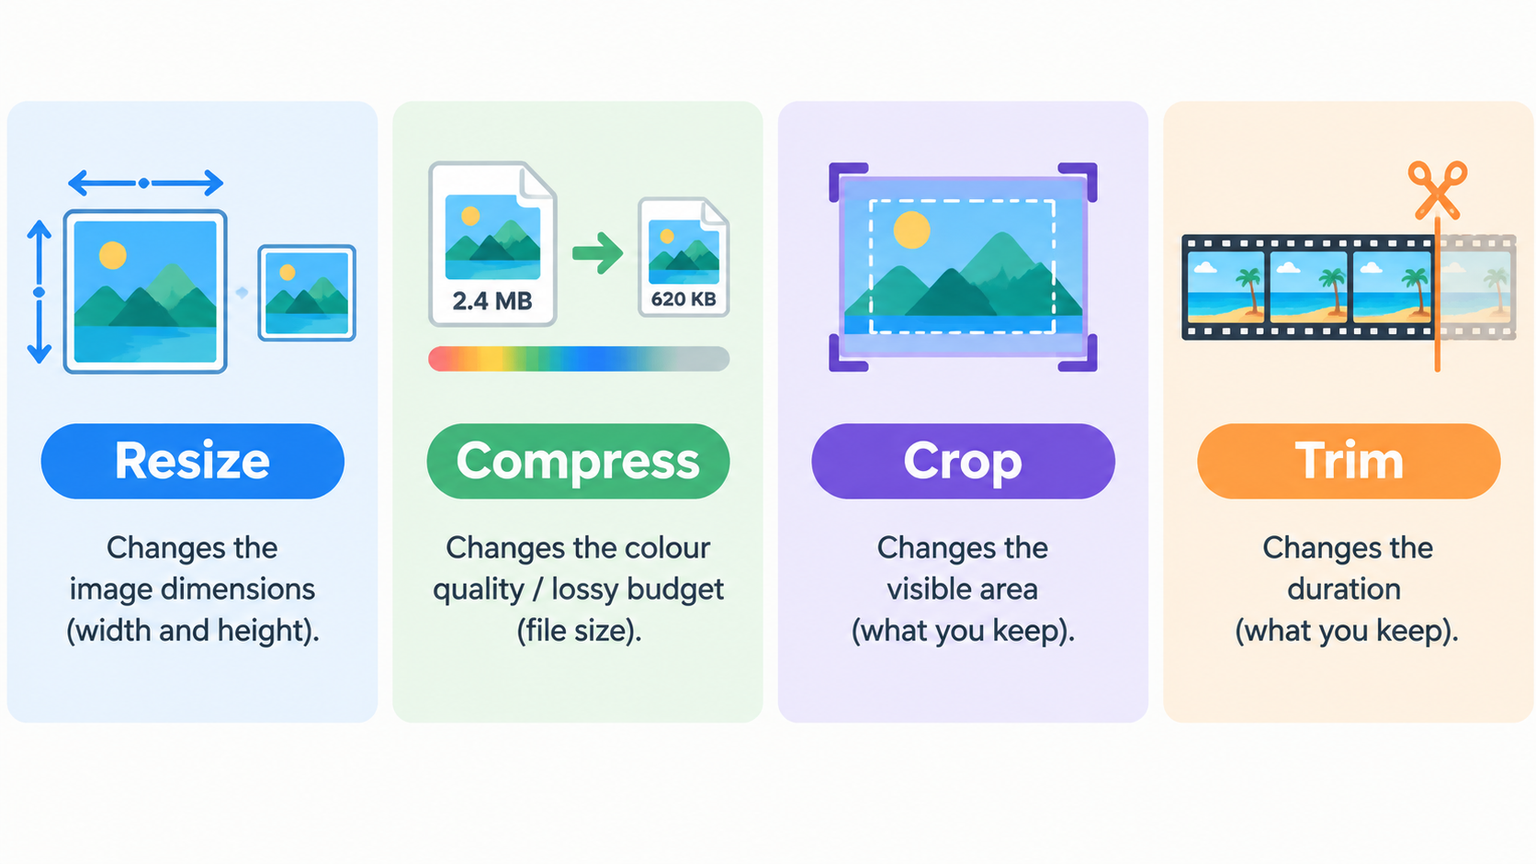
The recommended execution order is: resize → tune lossy strength → reduce colours → drop frames. Stop the moment the file clears the cap. ShotEdit gives the reasoning behind the ordering — resize first because it’s the most predictable reduction and costs the least visible quality per kilobyte saved, then lossy strength until artifacts appear in flat areas, then colour count while watching gradients for banding, then frame dropping last because choppy motion is usually the first thing a viewer notices.
Cropping deserves a specific warning. It can leave file weight almost untouched if the frame count and per-frame palette stay the same, which is why the experience of “I cropped it and it’s still too big” is so common. Crop to fix framing; don’t expect it to fix weight.
Trimming is the opposite: it cuts weight roughly in proportion to the frames removed, making it the bluntest but most effective lever for long recordings.
The stop-loss rule. When a long recording still misses the target at acceptable quality, change format rather than degrading further. ConvertICO reports that in its tests a 2x animated WebP came in at under one third of the size of the equivalent 2x GIF while holding more detail. Animated WebP keeps full colour and smooth transparency; MP4 is smallest of all but has no alpha channel, so transparent areas become white. ShotEdit’s blunt version of this advice: if a GIF still won’t fit after the strongest compression setting, the clip is too long for the format, and the same recording as MP4 is routinely five to ten times smaller at better quality.
Keep GIF output only where the destination demands a .gif file — chat clients, forums, some email clients, and template-bound CMS embeds.
A Decision Table: Which Lever Fixes Which Problem
| Problem | Lever | Why |
|---|---|---|
| Wrong display size on the page | Resize | Changes the canvas; also the largest predictable weight win |
| Over a hard upload cap, dimensions already correct | Compress (lossy strength) | Reduces palette rounding noise; biggest win on video-derived GIFs |
| Gradients banding after compression | Reduce colours (less aggressively) | Palette reduction is what causes banding |
| Too long a duration for the format | Trim / drop frames | Size falls close to proportionally with frames removed |
| Unwanted borders or desktop chrome visible | Crop | Fixes framing only — expect little or no weight change |
| Still over the cap at acceptable quality | Change format | Animated WebP keeps colour and transparency; MP4 is smallest but has no alpha |
Batch Resizing GIFs: Desktop Tools, CLI and Code
When you have fifty emoji to prepare or a product catalogue of animated swatches, single-file resizing stops being practical. Three paths cover almost every batch scenario.
Desktop Batch Tools vs gifsicle vs sharp
Desktop batch path. Light Image Resizer version 7.6.6.178, released 2026-09-09, lists animated GIF among its supported formats and runs on Windows 11, 10 and 8.1. Its v7 feature set includes shell integration for the Windows context menu, pre-defined profiles including file-size targets such as 256 KB, 1 MB and 2 MB, and a batch converter that processes folders and subfolders.
CLI path. gifsicle’s --resize with an explicit resampling method is scriptable, deterministic and preserves frame delays — the right choice for dozens of emoji or asset variants where you want the same operation applied identically every time. Deterministic output matters more than speed once you’re generating a set that has to look consistent.
Code path. The sharp npm package resizes GIF alongside JPEG, PNG, WebP, AVIF and TIFF in Node.js, and at version 0.35.5 more than 10,000 other projects in the npm registry depend on it. That dependency count is a useful proxy for how battle-tested the pipeline is — but when your own code re-encodes, verify frame-delay and palette handling yourself rather than assuming the defaults match your source.
Mobile and one-off batches. Where no desktop or script is available, ImgPlay and Wondershare UniConverter handle batch work; Wondershare’s Discord guide describes using UniConverter’s converter interface to batch resize a set of GIFs to 128×128 in a single pass, with a frame-rate setting available to help stay under a 256 KB emoji ceiling.
Batch tip. Resize all variants from one master file and one preset. Emoji sets and product swatches stay dimensionally consistent only if they all come from the same source at the same settings.
The Extract → Resize → Reassemble Pattern (and Its Risks)
Historically, the only way to resize an animated GIF was to take it apart. A BleepingComputer forum guide from November 2006, with replies running as late as 2022, documents the classic workflow: IrfanView’s “Extract all frames” to split the animation into individual files, batch conversion to resize and reformat them, then unFREEz to reassemble the frames into a new animated GIF with frame delays measured in hundredths of a second — an entry of 1 giving a delay of 1/100 of a second, so 100 equals one second.
That thread is kept here explicitly as a dated reference, not as a current tool recommendation. The 83×83 px avatar figure in it was a 2006-era forum rule, and the tools are two decades old.
The pattern itself is still a useful mental model, and it’s also the failure mode this article’s diagnostic checklist keeps returning to. Extracting and reassembling frames is exactly the route that breaks things: frame order can scramble if you don’t grab the first file when dragging, timing drifts unless you manually tune the frame delay against the original, and — as one 2008 reply in that thread describes — transparency had to be re-selected frame by frame during reassembly, once on extraction and again on save. A true in-place resize avoids all three problems by never taking the animation apart.
Enlarging a GIF: What Upscaling Can and Can’t Do
Upscaling interpolates; it doesn’t invent detail. Expect softness, and expect hard edges and small text to suffer most. ConvertICO states this directly — the process uses proven image-scaling algorithms and never invents detail that wasn’t in your GIF, so faces and text are not changed.
The resampling choice decides how the softness looks. Lanczos, bicubic or bilinear for photographic frames produces a smooth, natural result that reads like a larger video. Nearest neighbour for pixel art preserves sharp square pixels exactly. xBR/hqx sits between them, redrawing blocky edges as clean curves for emoji, stickers, sprites and other small low-resolution graphics.
The practical ceiling. ConvertICO’s own testing calls 2x the sweet spot for most GIFs, and notes that beyond 3x the result looks soft unless the GIF is pixel art. That’s a useful boundary. Past roughly 3x, blur becomes unavoidable for anything that isn’t pixel art, and the better move is to go back to the original video, project file or vector source rather than upscaling the GIF.
One trade worth taking. In ConvertICO’s tests a 2x animated WebP came in under one third of the size of the equivalent 2x GIF. If the platform accepts WebP, upscaling into WebP is usually the better outcome than upscaling into GIF — you get more detail at less weight.
And the rule that never changes. Upscaling never helps a file-size problem. A 2x upscale has 4x the pixels in every frame, so GIF files grow quickly. Never use upscaling as a weight fix.
Choosing a Resampling Method by Content Type
| Content type | Method | What it does |
|---|---|---|
| Clips, reaction GIFs, photos, gradients | Lanczos / bicubic / bilinear | Smooth and natural, like a larger video |
| Emoji, stickers, sprites, small low-res GIFs | xBR / hqx | Blocky edges redrawn as clean curves |
| Real pixel art, retro game graphics | Nearest neighbour | Every pixel becomes a sharp square |
For downscaling the same logic applies with a different risk profile: nearest neighbour on photographic footage produces aliasing and shimmer, while smooth interpolation on pixel art or UI screenshots produces blur where you wanted crisp edges.
Resized GIF Looks Wrong? A Diagnostic Checklist
Every ranking page asserts that timing is preserved. None of them say how to prove it or what breaks it. This checklist does.
Symptom → Cause → Fix
Banding or posterised gradients. Colour reduction went too far, or the palette was re-quantised on export. Fix: raise the colour count or re-export from the original source. Photographic and gradient-heavy GIFs show banding quickly, while flat UI screenshots and line art often survive 64 or even 32 colours with no visible difference.
Everything looks soft. You upscaled past the source size, or smooth interpolation was applied to pixel art or UI screenshots. Fix: go back to the original video or source file, or re-export with nearest neighbour.
Edges shimmer or look blocky. Nearest neighbour was used on photographic footage, or the tool rebuilt the animation from extracted screenshots instead of writing scaled frames. Fix: switch to Lanczos or bicubic and use a tool that resizes in place.
File size barely moved. The GIF was already optimised. Fix: the real levers now are colour count and frame rate, not dimensions. ShotEdit notes that if a GIF has already been through a compressor, the easy savings are gone, and pushing lossy higher shrinks it further only at the cost of visible dithering artifacts.
Timing or loop count changed. The pipeline extracted and reassembled frames rather than resizing in place. Fix: compare frame delay values and loop count before and after, then switch tools. This is the specific failure documented in the 2006–2009 forum workflow, where frame delays had to be manually tuned up or down until the new GIF matched the original’s playback speed.
Transparency turned black or white. Either the destination format has no alpha channel — MP4 cannot store transparency, so those areas become white — or the transparent colour index was dropped during processing. Fix: re-export as GIF or animated WebP. The historical version of this failure is documented in the same forum thread, where transparency had to be re-selected manually on every frame during both extraction and saving because the tool converted it to a background colour by default.
The animation is static after uploading. Some platforms render animated avatars and emoji as still images without the right account tier. Wondershare notes that on Discord, animated server emoji and animated profile pictures both require Nitro; without it they appear static. The file itself may be fine.
Conclusion
Resizing a GIF changes pixels and nothing else — which is exactly why it’s the safest first move, and also why it’s capped in how much weight it can remove. Start from your largest source, resize with the aspect-ratio lock on, then check the export against the specific platform cap in the table above — and re-verify that cap against the platform’s own help centre, since tier limits shift and published figures for the same platform already disagree. If you still miss the target, move down the ladder: lossy strength, colour count, frame count. Switch to animated WebP — or MP4 when transparency isn’t needed — before you keep degrading a GIF that has nothing left to give.
FAQ
Does resizing an animated GIF reduce its file size?
Yes, but only through pixel area. Halving width and height removes about 75% of per-frame pixels, so weight drops roughly in proportion at first. It’s not linear forever — heavily optimised GIFs and flat UI recordings barely move. If weight must fall further, reduce colours or frame count rather than shrinking again.
Will resizing a GIF break the playback speed or the loop?
A true resize only rewrites the pixel canvas; the frame delay array and loop metadata are copied unchanged. Speed changes only when a tool extracts and reassembles frames, or stores delays in different units. Verify by comparing frame delay values and loop count before and after export.
Can I enlarge a small GIF without making it blurry?
No — upscaling interpolates; it cannot invent detail that was never captured. Use nearest neighbour for pixel art and UI, smooth interpolation such as Lanczos or bicubic for footage. Around 2x is the practical ceiling for most GIFs; beyond 3x, go back to the original video or source file instead.
How do I resize a GIF to 128×128 for a Discord emoji?
Crop to a square first so the aspect-ratio lock doesn’t distort the subject. Resize to 128×128 px, then check the weight against the 256 KB emoji ceiling. If it’s still over, reduce colours or drop frames — do not shrink below 128×128, since that is a hard requirement.
What’s the difference between resizing, cropping, trimming and compressing a GIF?
Resize changes canvas dimensions; crop changes the visible area; trim cuts frames and duration; compress reduces the colour or lossy budget. Only resize and trim reliably cut file size — cropping often leaves weight almost untouched. Order of use: resize, compress, reduce colours, drop frames.
Are my GIFs uploaded to a server when I use an online resizer?
It depends on the tool’s architecture. Server-side tools upload and return the file; client-side tools run everything in the browser. Client-side tools use WebAssembly builds such as gifsicle, so the file never leaves your device. Test by disconnecting the network mid-resize — local processing still completes.
Tentang Penulis
Indie Hacker & PengembangSaya seorang indie hacker yang membangun aplikasi iOS dan web, dengan fokus pada pembuatan produk SaaS yang praktis. Saya mengkhususkan diri dalam AI SEO, terus mengeksplorasi bagaimana teknologi cerdas dapat mendorong pertumbuhan dan efisiensi yang berkelanjutan.
Terakhir ditinjau 3 Oktober 2026. Artikel ini ditinjau untuk akurasi dan diperbarui ketika alat atau perilaku platform berubah.